
Knauf Vapor Barrier Installation: The San Diego Owner’s Guide
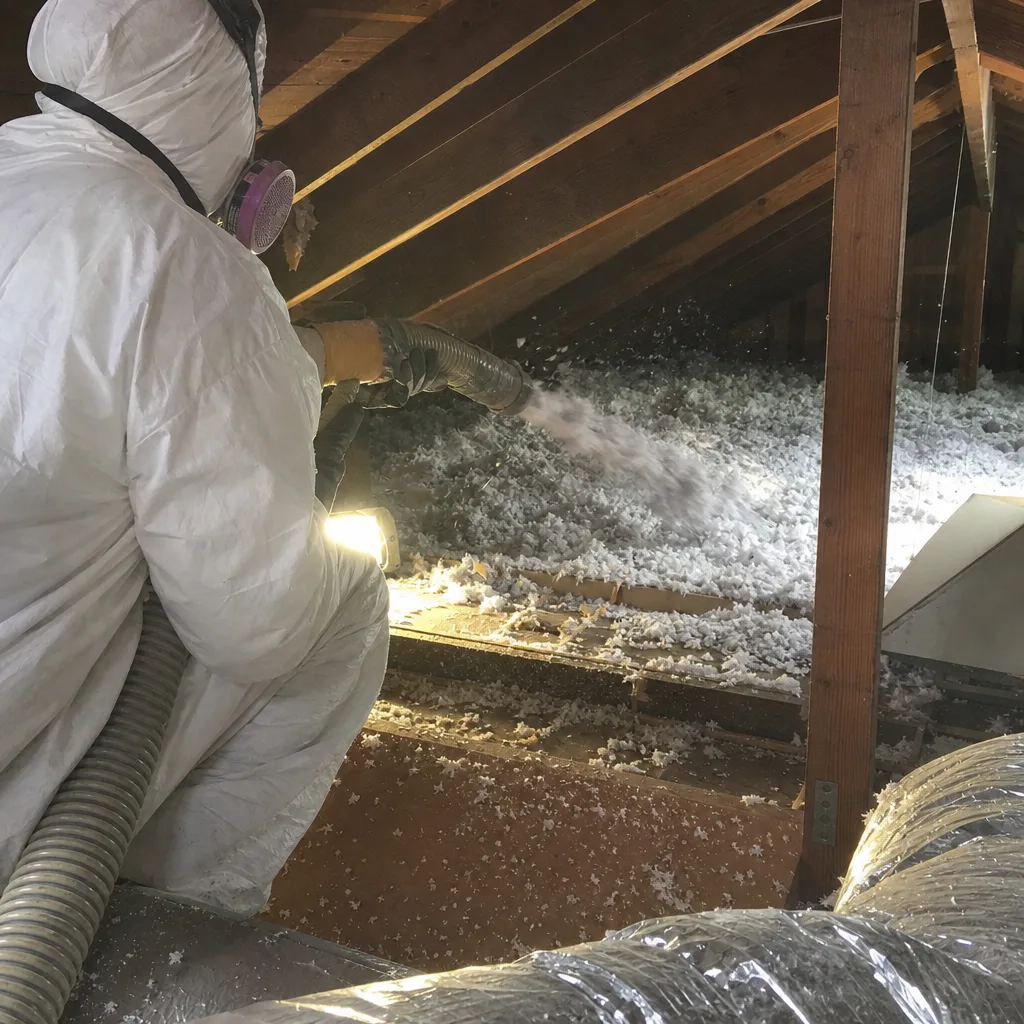
We install Knauf vapor barrier systems in San Diego homes weekly, usually for $1,100 to $3,800 depending on attic square footage, access difficulty, and whether existing vapor barrier needs to be pulled out first. Most jobs are completed same-day, and we keep Knauf-compatible materials on the truck. The reason most people call is straightforward: they notice moisture staining on the ceiling, higher indoor humidity, or condensation on attic-facing surfaces, then peel back the insulation and find the vapor barrier torn, perforated, or degraded. In coastal San Diego, the failure pattern is distinctive. Fog and marine air push through even small gaps, and once the barrier loses continuity, moisture migrates into the insulation layer and degrades the R-value. Sometimes the barrier was installed wrong from day one. Either way, the fix is to re-establish a continuous plane and verify the existing Knauf insulation hasn’t absorbed enough water to need replacement.
Which Knauf Models This Applies To
Knauf manufactures several vapor retarder and vapor barrier products under the ECOSE and Classic line names, and the ones we see most often in San Diego are the Knauf Insulation Board with factory-applied ASJ or FSK facing, and the knauf Vapor Retarder membrane sold in rolls for use with their batt and blown-in systems. If you have the original install paperwork, look for the product code starting with “VAP” or a facing designation like “ASJ” (all-service jacket) or “FSK” (foil scrim kraft). If you don’t, peel back a corner of the insulation and check whether the facing is a dull white paper-like sheet or a shiny foil laminate. The foil-faced Knauf products do double duty in San Diego, because they also reflect radiant heat in additions and converted garages. Here’s the compatibility gotcha most homeowners miss: Knauf’s kraft-faced batts are engineered for a specific perm rating, and swapping in a generic 6-mil plastic sheet from a hardware store can trap moisture on the wrong side of the wall assembly. In San Diego’s marine climate, that’s a mold invitation. We match the Knauf spec rather than improvising. For aftermarket options, we stock membranes from Reflectix as well, but for Knauf-specific installs we prefer to stay within the Knauf system, because the perm ratings and tape seams behave predictably together.
Signs Your Knauf Vapor Barrier Installation Is Failing
- Water stains on ceilings or upper wall corners. This usually means the vapor barrier has a hidden gap and moisture is condensing on the backside of the drywall. The stain shows up first at corners and edges where air leaks are strongest.
- Musty or damp smell in the attic, especially after foggy nights. When the barrier loses continuity, humid marine air from San Diego’s coastal zones moves through the insulation and wets the fibers. The smell is the first thing you’ll notice before any visible staining appears.
- Insulation batts that feel heavy or sagging. Knauf batts are engineered to maintain loft. If they’re waterlogged, they compress and drop. Once you see sagging between joists, the barrier above or below has already failed.
- Visible tears, tape peeling, or facing delaminating near can lights and HVAC penetrations. Every penetration through the barrier is a failure point. In older San Diego homes built before 2000, we routinely find barriers that were simply cut too loosely around recessed lights and never sealed.
- Condensation on attic ductwork or metal fasteners in summer. San Diego’s microclimates mean hot inland afternoons and cool coastal nights. When warm moist air hits a cold duct or nail head inside the attic, it condenses. A continuous vapor barrier prevents that air from reaching those surfaces.
Replacement Cost & What’s Included
For San Diego attics, Knauf vapor barrier installation runs between $1,100 and $3,800 installed. At the low end, a one-story accessible attic with clean decking and an intact existing barrier needs overlay and seam sealing. At the high end, you’re looking at a two-story with low clearance, old degraded barrier that has to be bagged and removed, and re-installation around HVAC equipment and recessed light housings. The labor splits roughly 60/40 toward installation time, because proper seam taping and penetration sealing matter more than the material cost. Every quote we write includes removal and disposal of the old barrier if needed, the Knauf-spec material matched to your existing insulation system, seam tape, penetration seals, and a written 365-day Done Right Promise on workmanship. If anything fails in that year, we return at no charge. No hidden line items, no surprise charge at the door.
DIY or Call Us?
Vapor barrier installation is one of the easier attic jobs to get wrong, and the consequences are slow and expensive: hidden mold in the insulation layer, degraded Knauf batts you can’t see from the living space, and a moisture problem that quietly erases the R-value you paid for. What you can safely do yourself is identify problem areas: photograph visible tears, check for condensation on ductwork, and note any staining. You can also verify your existing insulation has a facing at all. What you shouldn’t do is crawl across joists without a stable platform, cut and install barrier around electrical boxes, or use a stapler near outdated wiring. Electrical contact inside an attic is a genuine hazard. If you’re already seeing active moisture, call (619) 793-3676 and we’ll do a free assessment. If you want to tackle the airflow and moisture basics yourself, we’ll tell you exactly where to start during the call.
FAQs
A properly installed Knauf vapor barrier lasts between 15 and 25 years in San Diego’s climate, but the facing on the insulation itself may start degrading sooner if the attic is repeatedly exposed to moisture from leaks or unvented bathroom fans. The real variable in San Diego is humidity cycling from marine air. Homes within three miles of the coast see faster facing degradation than inland homes in the East County heat, because the alternating wet-dry cycle stresses the tape seams first. If your barrier is older than 12 years and you’re seeing staining, it’s due. Call (619) 793-3676 and we’ll give you an honest read.
Yes, a local tear with clean edges can be repaired with seam tape and a patch section, but this only works when the surrounding barrier is still intact and not brittle. If the facing crumbles when you handle it, or if the tear runs along a seam or penetration, a patch is a temporary fix and we’ll be straightforward about it. Small repairs run $150 to $400. Full replacement runs more. The difference comes down to how much continuous barrier we can preserve.
Most San Diego attics take between three and six hours, start to finish. The exception is low-clearance or heavily cluttered attics, or homes where a previous contractor left a mess that has to be dealt with first. We show up at a live trackable time, not a four-hour window, and you’ll have before-and-after photos on the invoice. Most customers book a Thursday or Friday and we’re done by early afternoon.
Yes, we stock Knauf vapor retarder membrane, seam tape, and penetration seals on every truck. We also carry Reflectix foil barrier for jobs where a radiant heat reflective layer makes sense in San Diego additions and sun-hit attic faces. When the right material isn’t on the truck, we source it same-day from a local supplier and finish the job without scheduling a second visit.
Good insulation doesn’t announce itself – you just stop noticing your energy bill.
If your Knauf vapor barrier is compromised, don’t wait for a water stain to tell you. Call (619) 793-3676 and we’ll give you a written price before any work starts, then install it right the first time. Chase Whitaker and the Laurel Attic Insulation San Diego crew have been doing this since 2003, and we’d rather tell you the truth about your attic than sell you something it doesn’t need.
Written by Chase Whitaker, Owner, Laurel Attic Insulation San Diego at Laurel Attic Insulation San Diego, serving San Diego and nearby areas.