
Johns Manville Vapor Barrier Installation: The San Diego Owner’s Guide
Vapor barrier installation using Johns Manville materials in San Diego typically runs $1.50 to $3.00 per square foot installed, with most residential jobs landing between $700 and $2,100 depending on crawlspace or attic access, square footage, and whether old material needs removal first. We stock Johns Manville-compatible vapor barriers on our trucks and can usually handle the job same day or next day. Most San Diego homeowners discover their vapor barrier has failed the hard way: a musty smell that won’t quit, higher humidity readings in the home, or visible condensation on crawlspace joists during a coastal June gloom stretch.
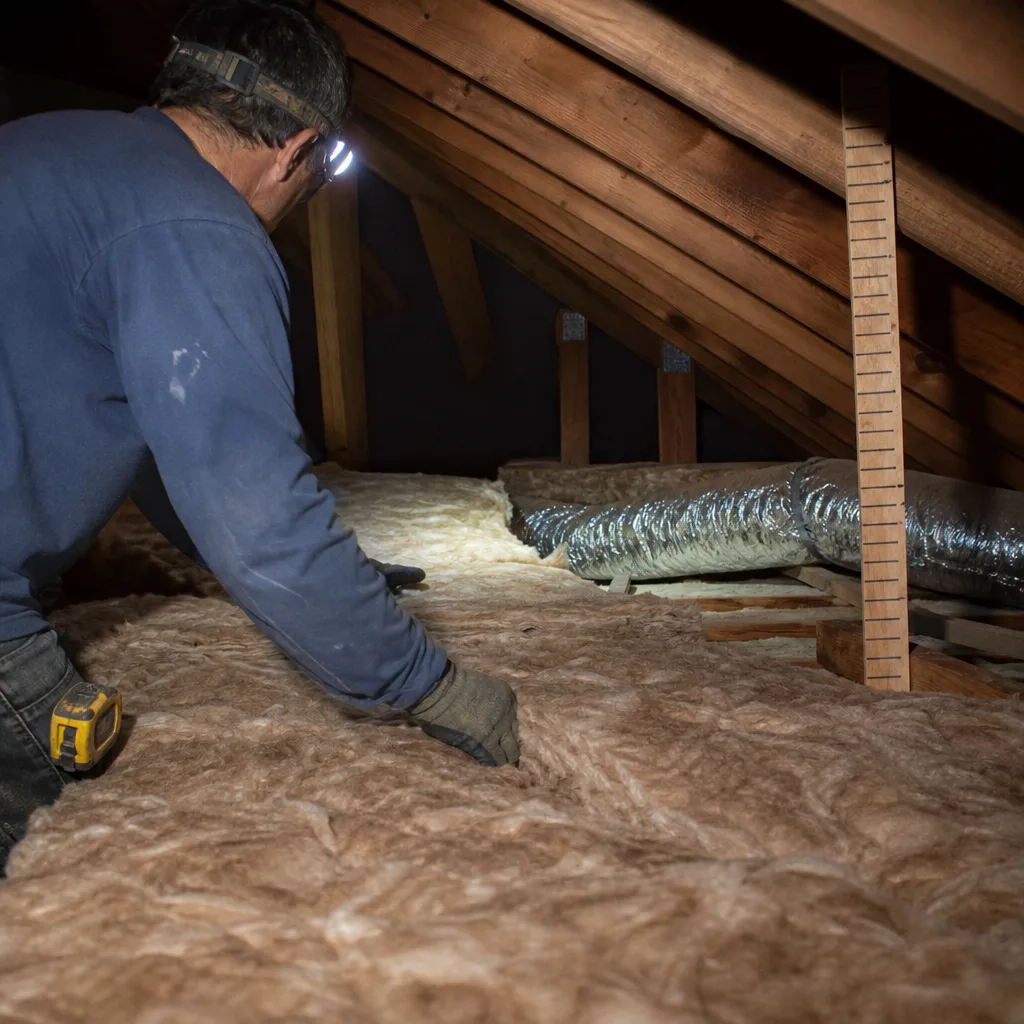
If you’re here, you’ve probably already identified that your Johns Manville product isn’t doing its job anymore. You want to know what it costs, whether it can be fixed, and who in San Diego can actually get it done without turning it into a three-week ordeal. That’s exactly what this page covers.
Key Takeaways
- Installed vapor barrier replacement in San Diego runs $700 – $2,100 for a typical residential job.
- Johns Manville vapor barriers come in multiple thicknesses (6-mil, 10-mil, 12-mil, and reinforced 20-mil) and the wrong one won’t hold up to crawlspace conditions here.
- We’re an independent San Diego installer, not affiliated with Johns Manville, but we work with their full vapor barrier line plus aftermarket equivalents.
- Every job includes a written price before work starts, a 365-day workmanship guarantee, and a free second visit if the repair fails.
- Call (619) 793-3676 and you’ll talk to a live person, any hour. We’re on call around the clock.
Which Johns Manville Models This Applies To
Johns Manville doesn’t sell vapor barriers as a single model number product for residential retrofit. What you’re dealing with is likely one of three things: a foil-faced or kraft-faced JM batt product where the facing acts as the vapor retarder, a standalone JM polyethylene sheet (commonly their 6-mil or 10-mil poly), or a JM crawlspace encapsulation liner used in combination with their insulation products. Each has different compatibility realities that matter in San Diego, and mixing them up is where we see most DIY mistakes happen.
The most common product we see in San Diego homes is the JM 10-mil reinforced poly vapor barrier installed over crawlspace dirt. If yours is thin, tearing at seams, or pulling away from foundation walls, it’s likely an older 6-mil install that was never rated for high-traffic crawlspaces. JM’s reinforced 10-mil and 12-mil products hold up significantly better, and we stock both on our trucks. For attics, JM makes a perforated radiant barrier that doubles as a vapor diffusion layer, but in San Diego’s mixed-humid coastal zones, we generally recommend against perforated products beneath insulation. That’s a real compatibility gotcha: a perforated vapor barrier in the wrong assembly traps more moisture than it releases, and San Diego’s marine layer creates exactly the wrong conditions for that mistake.
As for OEM versus aftermarket: Johns Manville poly sheeting is high quality, but it’s also a commodity product. We carry JM, but we also stock quality equivalents from Reflectix and other manufacturers when the job calls for a specific thickness or reinforcement spec JM doesn’t offer in a given width. For San Diego homeowners, the honest answer is that JM’s 10-mil reinforced poly is the sweet spot for most crawlspaces, and brand matters less than getting the mil thickness and sealing method right.
Signs Your Johns Manville Vapor Barrier Installation Is Failing
Here’s what we find when we show up to a San Diego home with a failing vapor barrier.
- Musty or “earthy” odor in the home, especially on humid mornings. This usually means ground moisture is making it past a torn or improperly sealed barrier and evaporating into the crawlspace air. The smell travels up through floor penetrations faster than you’d think.
- Visible condensation on the underside of floor joists. Without a working vapor barrier, warm San Diego air meeting cooler crawlspace surfaces creates condensation. Over time, that condensation feeds mold and wood rot on structural members.
- Torn or pulled-back poly sheeting in the crawlspace. You don’t need a moisture meter to spot this one. If the plastic is ripped, bunched up, or pulling away from foundation walls, the barrier’s compromised at those points. High-traffic areas under a home break down fast, and JM 6-mil tears at seams with surprising frequency.
- Increased indoor humidity readings, above 55% relative humidity. If you run a dehumidifier or your thermostat tracks humidity and the number keeps climbing, a failed vapor barrier is often the root cause in homes with crawlspaces.
- Higher cooling bills during San Diego’s warm months. A working vapor barrier keeps your conditioned air from fighting ground moisture. When it fails, your AC has to work harder to pull humidity out of the air, and you’ll see it in your summer SDG&E bill.
Replacement Cost & What’s Included
You already saw the headline number: $1.50 to $3.00 per square foot installed, which puts most San Diego vapor barrier replacements between $700 and $2,100. That range is real because no two crawlspaces are the same height, and access changes everything.
Here’s what drives the price in San Diego specifically:
- Square footage of the crawlspace or attic floor. More square footage means more material and more labor, but not in a linear way: bigger spaces actually cost slightly less per square foot because setup time amortizes across the job.
- Crawlspace height. A 36-inch crawlspace takes longer than a 48-inch one. Nobody can work as fast on their belly. This is the number one variable in San Diego homes, where some crawlspaces under older craftsman homes in Hillcrest are barely 24 inches.
- Old barrier removal. We don’t install over a failed barrier. Taking up the old poly, bagging it, and hauling it out adds labor to the job, but it’s the only way to do it right.
- Sealing method. Basic installs run seams and edges with tape and mechanical fasteners. A proper job runs poly up the foundation walls and secures it with furring strips or adhesive, which costs more and performs dramatically better over time.
- JM product thickness. 10-mil reinforced costs more than 6-mil but lasts years longer in San Diego’s ground-moisture conditions.
Every Laurel Attic Insulation San Diego vapor barrier job includes a written price before any work starts, removal of the failed material if needed, installation of JM or equivalent barrier to spec, seam sealing and perimeter detailing, and our 365-Day Done Right Promise in writing. If the barrier fails within a year due to our workmanship, we return and make it right at no charge. That’s a guarantee with a specific number attached, not a slogan.
DIY or Call Us?
Vapor barrier installation isn’t dangerous in the way a garage door spring or electrical panel is. You’re not going to hurt yourself rolling out poly sheeting. But here’s the reality Chase Whitaker will tell you straight: the material is cheap and the access is the expensive part. A homeowner can buy a roll of 10-mil JM poly for a few hundred dollars, but getting it laid correctly in a 30-inch crawlspace under a San Diego home is a different job entirely.
What you can safely check yourself: shine a flashlight into the crawlspace opening and look for standing water, torn poly, or exposed dirt. That’s worth doing once a year. What goes wrong with DIY vapor barrier work is almost always the same three things: the poly gets installed without proper seam overlap (JM recommends a minimum 6-inch overlap sealed with their specified tape), edges aren’t run up the foundation walls high enough, or penetrations like plumbing lines and piers get left unsealed. Any of those mistakes means the barrier still lets moisture through, and you’ve spent a weekend on a job that’s functionally incomplete.
If you want it done correctly with a written guarantee, call (619) 793-3676. You’ll get a live person, a straight answer on price, and a technician who’ll tell you if you actually need this work done at all. We’d rather lose a small job than sell a San Diego homeowner something their house doesn’t need.
FAQs
A properly installed JM 10-mil reinforced vapor barrier should last 15 to 20 years in a San Diego crawlspace; a 6-mil barrier in the same conditions often needs replacement within 5 to 8 years because our coastal moisture and ground contact degrade thinner poly faster than dry inland climates. The single biggest factor in lifespan is whether the barrier gets punctured by foot traffic or torn during other trades’ work in the crawlspace. Call (619) 793-3676 and we’ll help you figure out which product is actually installed in your home and how much life it has left.
Small tears and punctures can sometimes be patched with JM-compatible seam tape and an overlapping patch piece, but every patch creates a new seam that can eventually fail. If the barrier is more than 40% compromised or the original install didn’t run the poly up the foundation walls, you’re better off replacing it; patching a structurally failed barrier just buys you a year or two. Give us a call and we’ll tell you honestly which situation you’re in after looking at it.
Most single-family San Diego vapor barrier installations take one day from start to finish, including old material removal, new barrier installation, and seam sealing on the truck. We’ll send you before-and-after photos so you can see the work when we’re done, and you’ll pay from a link on your phone like everything else in your life works.
We keep JM 6-mil, 10-mil reinforced, and 12-mil products on our trucks, plus seam tape, furring strips, and equivalent Reflectix products for jobs that need a specific spec JM doesn’t carry in our market. That means when we diagnose a failed barrier, we can usually install the fix the same day instead of quoting a job and coming back a week later to actually do it.
Get a Straight Price on Your Vapor Barrier Job
If you’re smelling moisture in your San Diego home or you already know your vapor barrier is shot, do this: call Laurel Attic Insulation San Diego at (619) 793-3676. Tell us what you’re seeing. We’ll ask a few questions, look at photos if you have them, and give you a written price before any work starts. No door-step surprises, no vague four-hour windows, no voicemail tag. Just a straight answer from a crew that’s been doing this work in San Diego since 2003, led by Chase Whitaker, and backed by the Relay Visibility Guarantee and the 365-Day Done Right Promise. Good insulation doesn’t announce itself; you just stop noticing your energy bill.
Written by Chase Whitaker, Owner, Laurel Attic Insulation San Diego at Laurel Attic Insulation San Diego, serving San Diego and nearby areas.