
Last updated October 17, 2026
DIY vs Professional Insulation: The San Diego Homeowner’s Decision Guide
Here’s the counterintuitive truth most insulation guides won’t tell you: DIY insulation in San Diego is genuinely worth doing about 10% of the time. The other 90%, you’re either risking a code violation, a mold problem, or spending real money to create a problem a professional has to undo. California’s Title 24 energy code quietly changed the game for San Diego homeowners in ways that Home Depot’s insulation aisle won’t mention. This guide gives you the exact checklist to know which camp you’re in, real dollar figures for both paths, and the three San Diego-specific factors that flip the DIY-vs-pro decision faster than any national blog will admit. For more guides & resources on San Diego home improvement, explore our blog.
Quick Answer
DIY insulation makes sense in San Diego for exactly one scenario: adding unfaced fiberglass batts to an accessible, dry attic that already has clean insulation and needs a simple top-off. Every other job, from spray foam to crawl space work to anything involving existing rodent contamination or coastal moisture damage, should go to a licensed professional with California-specific credentials, because Title 24 compliance and San Diego’s unique marine layer climate turn optimistic weekend projects into expensive corrections.
Table of Contents
- The DIY-Viable Checklist: Four Non-Negotiable Conditions
- Real Cost Comparison: A 1,200 Sq Ft San Diego Attic
- Three San Diego-Specific Reasons to Hire a Pro
- What a DIY Mistake Actually Costs to Fix
- Spray Foam: Why DIY Is a Non-Starter in California
- The Hybrid Approach: What You Can Legitimately Do Yourself
- Common Mistakes to Avoid
- When to Call a Professional
- Frequently Asked Questions
- The Bottom Line
The DIY-Viable Checklist: Four Non-Negotiable Conditions
We said one scenario works, and it’s specific. Before you rent a blower or stack batts in the back of your truck, your attic needs to pass all four of these tests. Miss one, and the math stops working.
- Your attic has at least 30 inches of clearance. You need room to kneel, turn around, and maneuver batts or a blower hose without pressing your face against roof decking. Anything less, and you’re working in a space where a misplaced step or knee goes through the ceiling below or you compress the insulation you’re installing, which kills its R-value. R-value, by the way, is the number that measures how well insulation slows heat from moving through your ceiling. Higher number, better thermal resistance.
- The existing insulation is clean and pest-free. No roof rat droppings, no nesting material, no urine stains, no dead rodents. In San Diego, roof rats are a year-round fact of life, especially in neighborhoods with mature landscaping like Kensington, Normal Heights, and much of Point Loma. Rat contamination isn’t a cosmetic issue; it requires hazmat-style protocols including full PPE, removal, and sanitation. One whiff of ammonia from dried urine means the DIY project is over before it starts.
- No air sealing work is needed. If you’ve got gaps around plumbing penetrations, recessed lights that aren’t rated for insulation contact, a leaky attic hatch, or open chase ways where wires run between floors, adding insulation on top of those gaps is like putting a warmer blanket on a leaky boat. Proper air sealing requires accessing those gaps, choosing the right sealant for the substrate, and in some cases building enclosures around heat sources. That’s a contractor-grade job, not a weekend top-off.
- The job is a top-off, not a full replacement. If your existing insulation is still viable and you’re simply adding more to reach a higher R-value, DIY batts can work. But if anything needs to come out first, whether that’s water-damaged fiberglass or compressed old batts that have lost their loft, you’re now in removal territory. Removal means bagging, disposal, and potentially hazmat handling. That’s a different job entirely.
If you pass all four, you’re in the 10% where DIY is defensible. If not, you’re reading the wrong section of this guide. Keep going either way.
Real Cost Comparison: A 1,200 Sq Ft San Diego Attic
Let’s stop guessing and look at actual numbers for a typical three-bedroom San Diego home with a 1,200-square-foot attic. This is what the decision actually costs, not what a national blog with no local pricing knowledge might claim.
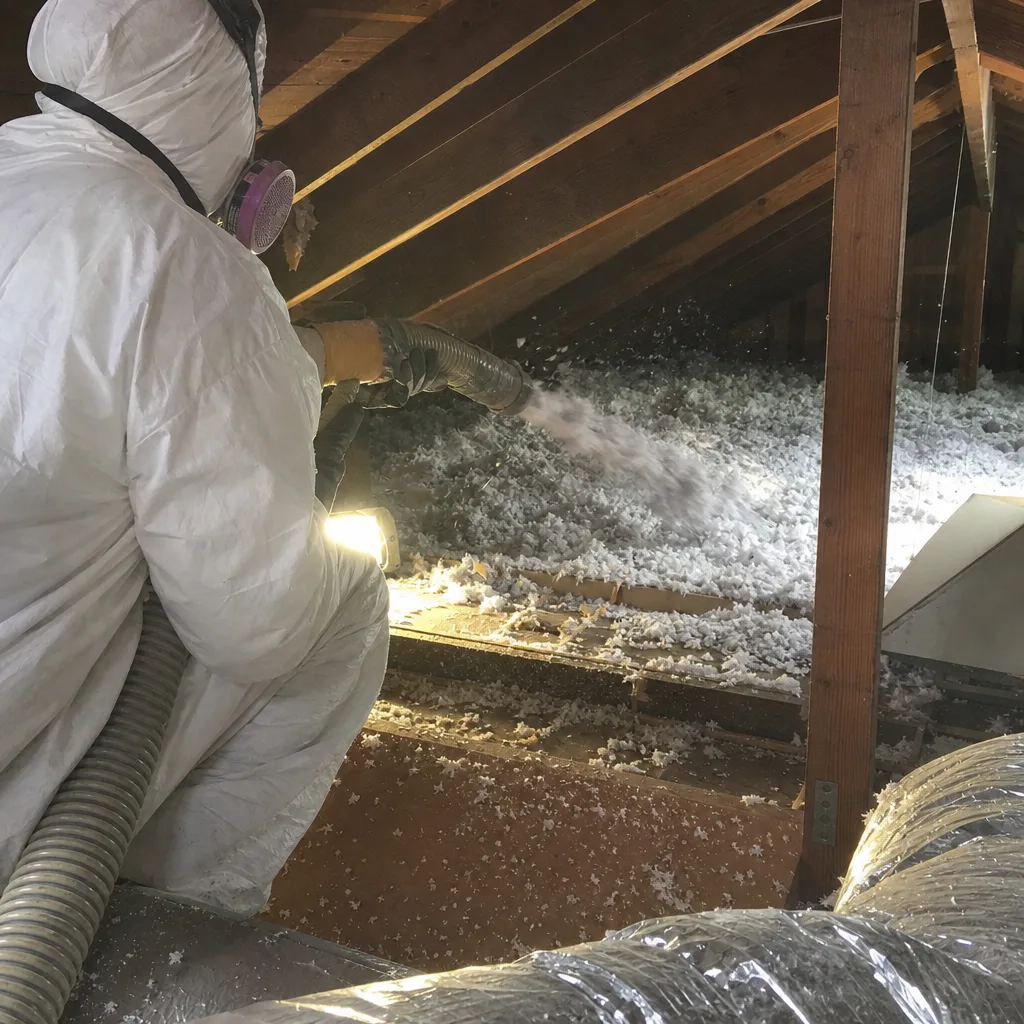
DIY blown-in cellulose or fiberglass route:
- Blown-in insulation machine rental from Home Depot or Lowe’s: $45 – $80 per day (free with 20+ bags purchased at some locations)
- Cellulose or loose-fill fiberglass bags to reach R-38 in a 1,200 sq ft attic: roughly 30 – 40 bags at $12 – $18 per bag, so $420 – $720
- Protective gear including respirator, gloves, knee pads, and eye protection: $50 – $90
- Total DIY materials and rental: $600 – $900
- Your time: one full Saturday, plus the drive to the store, plus the return of the machine, plus cleanup
Professional installation route for the same attic:
- Full assessment including access, air leaks, existing insulation condition, and rodent check
- Material, labor, cleanup, and disposal if needed
- Typical San Diego professional price for a 1,200 sq ft attic top-off to R-38: $1,500 – $2,200
- Your time: one phone call and about two hours of someone else’s work
So the DIY route saves roughly $700 – $1,300 on paper. Here’s where those savings evaporate, and we see this pattern in San Diego homes on a regular basis. The DIY homeowner discovers mid-job that one corner of the attic has compressed, mold-stained insulation from a past roof leak and now has no idea how to dispose of it. Or they finish the job and realize their attic hatch was never insulated, so they’ve paid for new insulation while leaving a four-square-foot hole in their thermal envelope. Or they rent the wrong blower type and end up with uneven coverage that the naked eye can’t detect.
Each of those corrections costs $300 – $800 to fix professionally. The savings line item starts disappearing quickly.
For what it’s worth, every job we do includes a written price before anything starts. No one should be guessing what an attic costs after the truck is in the driveway. That expectation comes standard, whether you’re doing it yourself or calling someone in.
Three San Diego-Specific Reasons to Hire a Pro
San Diego isn’t Phoenix, and it isn’t Seattle. That matters more than most insulation guides let on. The city’s climate, its wildlife, and its regulatory environment create conditions that don’t appear in generic advice columns.
1. Roof rat contamination requires hazmat protocols
San Diego consistently ranks among the top cities in the country for roof rat activity. They nest in attics, in wall cavities, and in the insulation itself. Their droppings and urine dry into dust that becomes airborne when you disturb old insulation. You’re not just inhaling dust; you’re inhaling particulates that can carry diseases including leptospirosis, salmonella, and hantavirus-adjacent pathogens. Professional insulation removal in San Diego involves full PPE, negative pressure containment in some cases, and proper disposal. It’s not a job for a dust mask from the paint aisle.
2. Marine layer moisture damage requires material-specific remediation
If you live west of I-5 in neighborhoods like Point Loma, Ocean Beach, or La Jolla, your attic sees more moisture than most of the county. The marine layer pushes humid air into attic spaces, and when that moisture meets the wrong insulation material, you get problems. Fiberglass loses R-value when wet. Cellulose can actually wick and hold moisture. Spray foam applied over damp surfaces won’t adhere correctly and can trap moisture against the roof decking. A professional assessment identifies the moisture entry points first, then selects a material rated for the environment. Rockwool, for instance, handles moisture differently than fiberglass does; it’s naturally hydrophobic and doesn’t absorb water in a marine layer context. That kind of material-speccing is exactly what separates a professional job from a big-box-store guess.
3. Spray foam requires California-licensed applicators
This one isn’t a recommendation; it’s a regulatory fact. Spray polyurethane foam (SPF) installation in California requires a licensed contractor with specific training. The two-component chemical reaction is exothermic, meaning it generates heat as it cures, and an improper mix can result in off-gassing, poor adhesion, and a product that never fully cures. No homeowner should be operating a two-part spray foam rig. The licensing, the insurance, and the training are non-negotiable. We’ll get deeper into spray foam specifics in a section below, but read on with this in mind: spray foam is categorically not a homeowner-grade product. If you’re considering professional help, see our guide on How to Hire a Insulation Contractor in San Diego: A Step-by-Step Guide.
We’ve been doing Attic Insulation in San Diego since 2003, and those three factors drive more of our work than any national trend ever has. San Diego is its own animal.
What a DIY Mistake Actually Costs to Fix
Let’s put dollar figures on the ways this goes wrong. We’re not here to scare you; we’re here to make the risk legible. These are real San Diego costs based on the corrections we’ve done for homeowners who tried it themselves first.
The misapplied vapor barrier scenario. This is the big one for coastal San Diego homes. A homeowner watches a YouTube video made by someone in Minnesota, buys a roll of polyethylene sheeting, and installs a vapor barrier facing the wrong direction or in a climate zone where no vapor barrier should exist at all. In a humid marine-layer environment, that barrier traps moisture inside the wall or ceiling cavity. Within a season, you’ve got mold. The average mold remediation in a San Diego attic or interior ceiling cavity runs $3,000 – $8,000 depending on square footage and whether drywall comes down. That’s on top of the cost of removing the incorrectly installed insulation and doing the job right.
The compressed insulation scenario. Batt insulation loses its R-value when compressed, but DIY installers often force batts into spaces that are too shallow, or they pile boxes and storage on top of newly installed insulation in the attic. Compressed R-38 fiberglass can drop to R-25 or lower. The homeowner thinks they’ve insulated properly; they’ve actually paid for 30% less performance. Correcting this means pulling the batt up, fluffing or replacing it, and in many cases removing whatever’s compressing it. Cost to fix: $400 – $900 for a 1,200 sq ft attic.
The rodent re-infestation scenario. This one starts with a homeowner who finds rat droppings, cleans them up superficially, throws down new insulation, and calls it done. But the entry points are still open, so the rats return within weeks. Now the new insulation is contaminated too. Proper remediation means finding and sealing every entry point first, then sanitizing, then insulating. The DIY attempt just doubled the cost of the project.
Spray Foam: Why DIY Is a Non-Starter in California
Spray foam insulation deserves its own section because it’s where we see the most ambition and the least caution. Somewhere along the line, YouTube convinced homeowners that a two-part spray foam kit from a home improvement store is a reasonable weekend project. It is not, and in California, it’s not just unwise, it’s legally and practically out of bounds.
California’s Title 24 energy code requires that any insulation job affecting a home’s energy compliance rating be verified by a certified HERS rater. That means a DIY spray foam job in a conditioned attic, which is increasingly common in San Diego as homeowners convert attics or pursue energy retrofits, isn’t just harder than it looks; it’s technically non-compliant for resale without a professional inspection on record. When you sell your home, the buyer’s inspector will ask for the paperwork. If the spray foam was installed by an unlicensed homeowner, you’re now looking at paying a contractor to remove it and reinstall properly, or facing a disclosure issue in escrow.
The chemistry itself is unforgiving. Spray foam is a two-component mixture, an isocyanate and a polyol resin, that react at a specific ratio and temperature. If the ambient temperature in your San Diego attic is outside the manufacturer’s stated range, typically 65 – 85 degrees Fahrenheit, the reaction doesn’t happen correctly. If the A and B components aren’t mixed at the right pressure, you get off-ratio foam that never fully cures, off-gasses for months, and provides none of the intended insulating value. Professional applicators in California carry licensing, training, and insurance that covers this work. Products like Demilec and Icynene are expressly sold through professional channels for this reason.
If spray foam is in your future, hire it out. The math isn’t even close. We handle Spray Foam Insulation in San Diego with licensed crews and a written guarantee on every job, because spray foam isn’t where you learn by doing.
The Hybrid Approach: What You Can Legitimately Do Yourself
Here’s the good news: there’s a real, meaningful middle path. You don’t have to pick between “call a pro for everything” and “spend your savings on a spray foam rig.” The smart San Diego homeowner does the cheap, accessible, low-risk tasks themselves and hires out the structural work. Here’s the specific task list with dollar estimates.
- Attic hatch insulation. The attic access panel or pull-down ladder opening is the single most overlooked weak point in a San Diego thermal envelope. Buy a sheet of rigid foam board, cut it to fit the hatch, and glue it to the attic side. Add weatherstripping around the perimeter. Cost: $30 – $60 in materials, about two hours of work. Result: a sealed hatch that doesn’t leak conditioned air.
- Outlet and switch plate gaskets. Exterior walls with outlets and switches leak air constantly. Foam gaskets that fit behind the cover plates cost about $0.50 each and take five minutes per outlet to install. A 1950s San Diego home might have 20 – 30 exterior wall outlets. Total cost: $15 – $20, one afternoon.
- Weatherstripping around doors and windows. This isn’t insulation in the attic sense, but it’s the same thermal envelope discipline. Worn weatherstripping on a single exterior door can leak as much air as leaving a window cracked a quarter inch. New weatherstripping kits cost $15 – $40 per door depending on the style. A full San Diego home with three exterior doors: under $120.
- Ductwork inspection and minor mastic sealing. If you can safely access your ductwork, look for gaps at joints and connections. HVAC-rated mastic and mesh tape can seal those gaps. Do not use duct tape; it fails within a year in an attic temperature cycle. Cost: $25 – $50 in materials for a typical house.
Total DIY task list: under $250 and a weekend, with zero risk of a catastrophic mistake. These are the tasks that make sense for a homeowner. Leave the attics, the crawl spaces, the spray foam, and anything involving existing insulation to a licensed pro. If you need Insulation Removal in San Diego before a fresh install, that’s a contractor job every time.
Common Mistakes to Avoid
- Blocking soffit vents with new insulation. Soffit vents in the eaves let fresh air into the attic. Blow or lay insulation over them and you’ve just created a stagnant, moisture-prone attic. In San Diego’s marine layer climate, that’s a mold invitation. Use baffles, and if you don’t know what a baffle is, stop and call someone.
- Installing a vapor barrier in a San Diego climate zone that doesn’t call for one. Vapor barrier placement is climate-specific. What works in Minneapolis fails in San Diego. A misplaced polyethylene sheet traps moisture and creates the $3,000 – $8,000 mold scenario we outlined above.
- Using un-faced batts where faced batts are needed, or vice versa. The facing on a batt acts as a vapor retarder on one side. Install it backward and you’ve created a moisture trap. In a conditioned attic in coastal San Diego, this is a fast path to trouble.
- Assuming more insulation is always better. Pouring R-60 on top of a problem doesn’t solve the problem. If you haven’t addressed air leaks, moisture entry, or existing contamination first, you’ve just made the eventual professional correction more expensive.
- Ignoring Title 24 documentation requirements. If your insulation job affects your home’s energy compliance, which most attic work in San Diego does, the work needs a HERS rater verification on record when you sell. A DIY job with no paperwork becomes a liability in escrow.
- Borrowing a friend’s truck and buying batts without measuring the joist spacing. Attic joists are either 16 or 24 inches on center. Buy the wrong width batts and you’re cutting every single one by hand, or worse, compressing them to fit and losing R-value.
We could keep going, but the pattern’s clear. The mistakes aren’t random; they’re all variations on the same theme: doing structural work without the climate, code, and contamination knowledge that a San Diego professional acquires over years of doing nothing but this.
When to Call a Professional
Call a pro when the job involves any of the following: existing rodent or pest contamination, visible mold or water staining, spray foam of any kind, insulation removal of any kind, crawl space work, vaulted ceilings, or a home built before 1980 where the existing insulation might contain asbestos. Also call a pro if you simply don’t want to spend your Saturday in a 110-degree attic breathing dust. That’s a perfectly valid reason. Laurel Attic Insulation San Diego offers free estimates in San Diego, and we’ll put a written price in front of you before anything starts. Call (619) 793-3676 and a live person answers, 24/7. No voicemail queue, no four-hour windows. We’re part of the Relay Home Co. family and we track every job the way a modern San Diego homeowner expects: live technician tracking, before-and-after photos, and a written guarantee delivered before we leave. That’s our normal. It should be yours too.
Frequently Asked Questions
Professional attic insulation in San Diego typically runs $1,500 – $2,200 for a 1,200 sq ft attic, depending on the material selected, the target R-value, and whether any existing insulation needs removal first. Larger attics, spray foam, and homes requiring air sealing go higher. Every Laurel Attic Insulation San Diego job includes a written price before any work starts, so you’ll know your exact number before committing.
In most San Diego homes, topping off existing insulation is significantly cheaper than replacing it, sometimes half the cost. Replacement becomes necessary when the existing insulation is contaminated by rodents, water-damaged, or compressed beyond recovery. If you’re unsure which applies, call us at (619) 793-3676 for an assessment; we’ll tell you the truth even if the answer is “you don’t need us yet.”
We offer same-day and next-day service scheduling for many San Diego insulation jobs, and our phone is answered by a live person 24/7. Call (619) 793-3676 and tell us what’s going on, and we’ll give you a real arrival window with live tracking, not a vague four-hour block. If it’s urgent, we’ll do everything we can to get a technician to you the same day.
Most insulation top-off jobs in existing San Diego homes don’t require a building permit, but any job affecting energy compliance, including spray foam in conditioned attics, requires HERS rater verification under California’s Title 24. For full details, read our guide to Insulation Permits, Codes & Inspections in CA: What You Need to Know. Professional contractors handle that documentation as part of the job. A DIY job may leave you without the paperwork you need at resale.
For a San Diego attic, the Department of Energy recommends R-30 to R-60 depending on your home’s construction and whether your ducts run through the attic. Most San Diego homes built before 1990 are under-insulated at R-19 or less, which means a top-off to R-38 or R-49 yields meaningful savings. A professional assessment accounts for your home’s specific layout and your duct configuration.
For San Diego’s mild coastal climate with marine layer moisture, certain materials perform better than others depending on the home’s location and construction. Rockwool and CertainTeed offer products that resist moisture better than standard fiberglass, and professionally applied spray foam brands like Demilec and Icynene deliver exceptional air sealing for conditioned attics. The right answer depends on your home’s specific conditions, which is why a pro assessment matters more than a generic online recommendation.
The Bottom Line
DIY insulation in San Diego works when four things are true: your attic is open and accessible, the existing insulation is clean and pest-free, no air sealing work is needed, and you’re doing a simple top-off rather than a replacement. That’s the narrow window. Everything else, from spray foam to rodent contamination to marine-layer moisture issues, belongs with a licensed professional who carries California credentials and puts everything in writing. The hybrid approach lets you handle the cheap, safe tasks like outlet gaskets and attic hatch insulation yourself while a pro handles the attic itself. Our advice is the same whether you hire us or not: draw the line where the risk starts.
Written by Chase Whitaker, Owner at Laurel Attic Insulation San Diego, serving San Diego since 2003.