
Last updated October 17, 2026
Seasonal Insulation Care for San Diego: Year-Round Homeowner’s Guide
Most San Diego homeowners think insulation is a set-it-and-forget-it feature. That assumption costs them money every single month. The truth is that San Diego doesn’t experience winter the way Minneapolis does, but it does have four distinct stress cycles that hammer attic insulation: Santa Ana wind events in the fall, the marine layer through winter, pre-summer heat buildup in spring, and peak cooling demand from June through September. Each cycle creates a specific maintenance window. Miss them and you’ll pay for it in higher SDG&E bills, ceiling stains, and air that never quite feels right. This guide walks you through what to check, when to check it, and what actually matters for a San Diego attic. For a deeper dive, see our Complete Guide to Insulation in San Diego.
Quick Answer
Seasonal insulation care in San Diego follows four windows: inspect for wind-shifted attic insulation after October and November Santa Ana events, check for condensation damage during the December through February marine layer season, verify attic ventilation before summer heat arrives in March through May, and track your utility bill as a monthly insulation performance report from June through September. Most homeowners should plan on two focused inspections per year, one in late fall and one in early spring, with basic checks in between-our Attic Insulation Maintenance Checklist for San Diego Homeowners covers exactly what to look for.
Table of Contents
- October – November: The Santa Ana Wind Effect on Attic Insulation
- December – February: Marine Layer Condensation and the Mold Window
- March – May: The Attic Ventilation Check That Controls Your AC Bill
- June – September: Using Your Utility Bill as an Insulation Report Card
- Year-Round: Wildfire Smoke and Attic Bypass Sealing
- Understanding R-Value for San Diego’s Climate Zone
- Common Mistakes to Avoid
- When to Call a Professional
October – November: The Santa Ana Wind Effect on Attic Insulation
Santa Ana winds don’t just knock over patio furniture and chaparral fires across San Diego County. They create pressure differentials inside your attic that physically move insulation. Here’s how it works: when sustained winds hit 30 to 50 mph against your roofline, the attic space experiences negative pressure on the leeward side. Loose-fill insulation, especially blown-in cellulose, is light enough that this pressure differential redistributes it. In Clairemont and Scripps Ranch attics we’ve inspected after major wind events, blown-in fiberglass and cellulose had shifted 4 to 8 inches away from eaves, leaving bare drywall at the perimeter where heat transfer is highest.
The exposed areas aren’t just energy leaks. They create cold spots on the ceiling below, which then interact with the marine layer air we’ll talk about in the next section. That combination is what leads to ghostly condensation rings on bedroom ceilings in Mira Mesa and La Jolla every January.
What to check after any Santa Ana event with gusts over 35 mph:
- Look at your eaves from the attic access point. Bring a flashlight and check the perimeter, especially the corners where roof planes meet. Blown-in insulation should sit evenly against the exterior top plates. Bare drywall or plywood showing means the wind moved it.
- Check batt sections near gable vents. Fiberglass batts stapled between joists near attic vents get lifted and displaced by turbulent airflow. They’ll look pulled back from the vent opening or bunched toward the center of the attic.
- Listen for whistling during the next wind event. A properly sealed attic doesn’t whistle. Whistling means air is moving through gaps it shouldn’t, and that same air is eroding insulation coverage.
- Inspect the attic access hatch seal. Pressure differentials pull conditioned air up through poorly sealed hatches. If dust has accumulated in a starburst pattern around the hatch trim, you’ve got an active air leak.
In our experience across San Diego, the homes most affected are those with original 1970s and 1980s loose-fill that has settled to R-19 equivalent or lower. The material is already too light and too shallow. High winds finish the job. You can temporarily rake displaced loose-fill back into place with a roof rake, but if the material has settled below the top of the joists anywhere, the real fix is topping it off. Most San Diego attics need R-38 to R-49 for our climate zone, and most original installations from the 80s are nowhere near that. If you’re spotting bare ceiling drywall after every wind event, schedule a free estimate before the marine layer settles in.
One note: Santa Ana season overlaps with peak wildfire risk. We’ll cover smoke infiltration separately later in this guide, but if you’re up in the attic checking insulation and smell smoke, close everything up and wait for clean air. Attic dust plus wildfire particulate is not a respiratory combination anyone should volunteer for.
December – February: Marine Layer Condensation and the Mold Window
The marine layer that parks over coastal San Diego from December through February creates a humidity environment most homeowners underestimate. Overnight relative humidity in Point Loma, Ocean Beach, Pacific Beach, and La Jolla regularly hits 75 to 85 percent during these months. That moisture doesn’t stay outside. It infiltrates attics through ridge vents, soffit vents, and gable vents, and it condenses on the first cool surface it finds.
The cool surface it finds is usually the attic floor, which is your ceiling from below. When attic insulation is inadequate or unevenly distributed, the drywall beneath stays cool while humid marine air circulates above it. Condensation forms. It soaks into the drywall, wets the top layer of insulation, and creates exactly the environment mold needs: darkness, moisture, and an organic food source in the paper backing of drywall and fiberglass batts.
What to look for during marine layer season:
- Ceiling stains with irregular edges. Water leaks from plumbing create defined rings. Condensation stains are diffuse and splotchy, often following joist lines where the drywall is coolest. They show up most often in corners and along exterior walls.
- Rust on roofing nail points. From inside the attic, look up. If the nails poking through the roof deck show rust even without any roof leak, you have a condensation problem. That rust means attic air is staying wet for hours at a time.
- Insulation that feels damp to the touch. Fiberglass and cellulose both lose R-value when wet. Fiberglass loses up to 40 percent of its thermal performance when saturated. Cellulose mats down and never recovers its loft. Touch-test insulation near the eaves and around any bathroom fan ducting.
- Earthy, musty smell when you open the attic hatch. This is the earliest indicator of mold, often detectable before visible growth. If the attic smells like a damp basement in February, address it before March.
If you catch condensation damage early, before visible mold colonies form, you can usually dry the affected area with fans and fix the root cause. Root causes in San Diego homes are almost always one of three things: inadequate attic ventilation, bathroom or kitchen exhaust fans venting into the attic instead of through the roof, or insufficient insulation depth allowing the ceiling plane to stay too cold. None of these are DIY fixes. Bathroom fans vented into the attic are a code violation and a mold factory. If you find one, correct routing through a proper roof vent termination before next winter.
The health stakes here are real. Mold in attic insulation and ceiling drywall contributes to indoor air quality problems that affect respiratory health, especially for kids and anyone with asthma. San Diego’s coastal marine layer affects roughly 70 percent of the city. If you live west of the 5, or within a few miles of the coast anywhere in San Diego, condensation checks from December through February should be on your calendar every year.
March – May: The Attic Ventilation Check That Controls Your AC Bill
Spring in San Diego is where small attic problems become expensive summer ones. The window is March through May, before the first real heat spike hits in June. During this window, the critical check isn’t insulation depth. It’s ventilation. Here’s why: your attic ventilation system determines whether the heat that builds up in your attic during summer can escape or whether it radiates down through the ceiling into your living space, forcing your AC to fight two heat sources at once.
A San Diego attic without proper ventilation can hit 140 to 150 degrees Fahrenheit on a 90-degree summer day. When that happens, even R-38 insulation is only slowing the inevitable. Heat radiates through the ceiling assembly, your AC cycles longer, and your bill climbs.
The spring ventilation check takes about 15 minutes with a ladder and a flashlight:
- Count your intake vents. Soffit vents, the little grilles under the eaves, should be visible from the attic side. They need to be unobstructed by insulation. Blown-in insulation tends to drift over soffit vents over time, choking off intake air. Use baffles or insulation dams to keep soffit vents clear.
- Check your exhaust vents. Ridge vents, static roof vents, turbine vents, or gable vents. Whichever style your home has, verify they’re not blocked by debris. After Santa Ana season, leaves, dust, and small branches accumulate on and inside static vents.
- Verify the balance. Attic ventilation works on the stack effect. Intake at the soffits, exhaust at the ridge or upper roof. Ideally you’ll have 1 square foot of net free vent area for every 150 square feet of attic floor space when there’s no vapor barrier, which describes most San Diego homes built before 1990.
- Check the bathroom fan terminations again. Spring is when you’ll first notice if your bathroom fans are venting into the attic, because shower steam from spring mornings becomes visible condensation before the attic warms up for the day.
If your attic lacks soffit vents entirely, which is common in many 1960s tract homes in Clairemont, North Park, and Allied Gardens, you have a structural ventilation deficit. Adding intake ventilation on a retrofit basis is a project, but it’s one of the highest-ROI insulation improvements we make in San Diego. Without intake air, your ridge vent or turbine vents are pulling air from the living space below, which is the opposite of what you want.
This is where insulation and ventilation work together. Proper attic insulation in San Diego slows conductive heat gain through the ceiling. Proper ventilation removes the heat before it has a chance to build up. Get both right and your AC works less, your home holds temperature longer, and your summer electric bill drops, typically 10 to 20 percent depending on the starting condition of the attic.
June – September: Using Your Utility Bill as an Insulation Report Card
From June through September, your SDG&E bill is the most honest insulation report you’ll ever get. But most people read it the wrong way. They see a higher bill in August, blame the heat, and move on. The right way to read it is as a dollar-per-square-foot benchmark that tells you whether your attic insulation is doing its job.
For a San Diego home with decent attic insulation (R-38 equivalent or better) and functioning ventilation, cooling cost during peak summer months averages $0.12 to $0.15 per square foot of conditioned space, per month, across June through September. So a 2,000 square foot house should land between $240 and $300 for the cooling portion of the electric bill in July and August. If you’re seeing $0.20 or more per square foot, especially in July through September, your attic envelope is leaking conditioned air. In our experience across San Diego, that almost always traces back to insufficient attic insulation depth and unsealed attic bypasses.
Here’s how to run the check for your home:
- Pull your July and August bills. Note the total kWh and the cost. If you have solar, add the solar production you consumed to the grid draw to get total consumption.
- Estimate the cooling share. In San Diego without a pool or EV charging, cooling is typically 40 to 55 percent of July and August electricity usage. The rest is baseline load (fridge, water heater, washer/dryer, electronics).
- Divide cooling cost by your home’s square footage. If the result is above $0.15 per square foot, investigate the attic before considering a new HVAC system.
A related check: take a temperature reading at the ceiling plane on a hot afternoon. An infrared thermometer pointed at the ceiling in the warmest room should read within 3 to 5 degrees of the ambient room temperature. If the ceiling surface is 8 to 10 degrees warmer than the air at thermostat height, heat is radiating down through insufficient attic insulation. That temperature gap is your cooling budget burning.
One thing we hear a lot from San Diego homeowners: “But I already have insulation up there. It’s not a new house.” Almost every home built in San Diego before 1990 has original insulation that has settled to R-19 equivalent or less. The energy code at the time didn’t require more than R-19 in most of the county. The material has settled, compacted, and in many cases degraded. What was adequate in 1985 is now the main reason your AC runs at 6:00 a.m. in late July. If you’ve never looked at what’s actually up there, the utility bill check above is your first clue that it’s time to.
Year-Round: Wildfire Smoke and Attic Bypass Sealing
Wildfire smoke has become a year-round concern in San Diego. It’s no longer just a September and October issue. Smoke season now stretches from late spring through fall in dry years, and when a fire is burning anywhere in the county, fine particulate matter finds its way into homes through gaps you can’t see.
Attics are a major infiltration point. Smoke particles are tiny, under 2.5 microns for the most health-relevant fraction, and they follow the same air paths that heat and humidity use. Those paths are called attic bypasses: gaps around recessed light fixtures, unsealed top plates, gaps around plumbing stacks and electrical penetrations, unsealed knee walls, and open wall cavities behind shower surrounds and chimney chases. In a typical San Diego home, the cumulative leak area from attic bypasses equals leaving a window open about 8 square inches, 24 hours a day, year-round.
When wildfire smoke settles over San Diego, that open window is pulling smoke into your living space. You smell it indoors even with every window closed, and the HVAC filter will eventually capture some of it, but the attic remains a reservoir of smoky, ash-laden air that works its way down through ceiling penetrations for days after the outdoor air clears.
Sealing attic bypasses changes both the energy equation and the air quality equation. Here’s what that means practically:
- Recessed lights: Older can lights are leaky by design. Non-IC-rated cans can’t be covered with insulation, which creates both a thermal hole and an air hole. Sealing options include airtight trim kits rated for insulation contact or replacing old cans with sealed LED wafer fixtures that can be fully covered.
- Top plates: Where wall framing meets the attic floor, there’s a seam in the envelope. Caulk or foam sealant along exterior top plates and interior top plates closes the main convective path between wall cavities and attic air.
- Plumbing and electrical penetrations: Every pipe, wire, and conduit that enters the attic from below carries a small air gap around it. Individually they’re small. Together across a whole house, they add up to a meaningful leak area. Expanding foam and caulk close them in minutes per fixture.
- Attic hatch: The hatch is a door that’s never weatherstripped. Installing foam gasketing and adding insulation board to the back of the hatch panel closes one of the biggest, most overlooked leakage sites in San Diego homes.
Air sealing and insulation work together. The sealing stops the air movement that bypasses insulation entirely, and the insulation slows the heat transfer that remains. In attics where we’ve done both in San Diego homes, homeowners typically report a 15 to 25 percent reduction in cooling load, a noticeable drop in dust accumulation, and no detectable wildfire smoke smell indoors on days when neighboring homes are choking on it. For anyone with allergies or asthma, or anyone who lived through the smoke from the 2025 Southern California fires, that indoor air quality improvement is the kind of change you feel the first week.
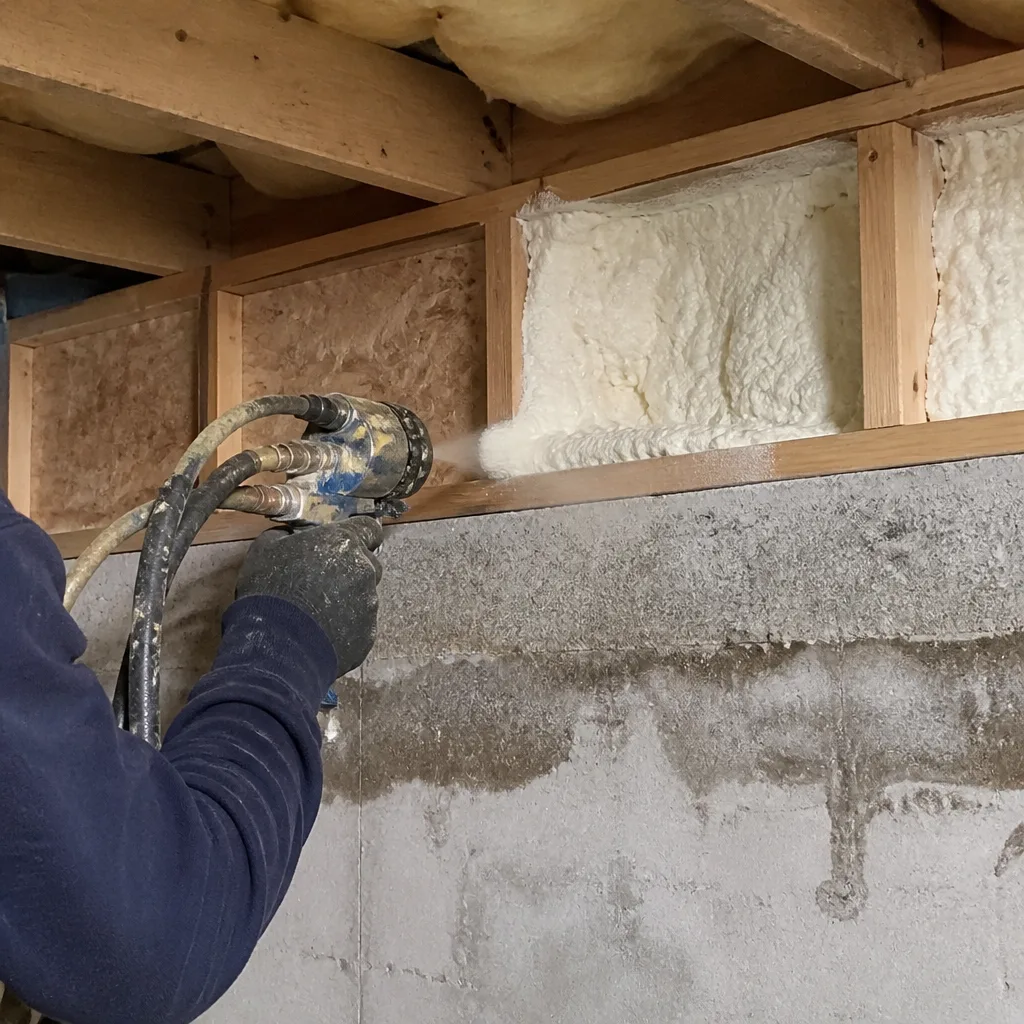
If you want to tackle attic bypass sealing as a project, spray foam insulation in San Diego is the go-to method for sealing penetrations and air-sealing the attic floor, since the expanding foam fills the shape of whatever gap it’s applied to and does both jobs at once: seal and insulate.
Understanding R-Value for San Diego’s Climate Zone
R-value is the number that measures how well insulation slows heat from moving through your ceiling. Higher numbers mean more resistance to heat flow. San Diego sits in climate zone 7 when it comes to building codes, and current California energy code (Title 24) requires R-38 to R-49 attic insulation for new construction and major renovations, depending on the specific location and assembly. Most existing homes in San Diego fall well short of that, simply because they were built before the requirement existed.
What does the R-value gap mean in real terms? Going from R-19 (a common finding in 1970s and 1980s San Diego homes) to R-38 typically cuts attic-driven heat gain by half. In a 2,000 square foot house, the energy savings works out to several hundred dollars per year, every year, for as long as the insulation lasts. Loose-fill fiberglass, blown-in cellulose, and spray foam all hold their R-value effectively indefinitely, as long as they stay dry and aren’t compacted by foot traffic or wind displacement.
Material choice matters for how the insulation performs in San Diego conditions:
- Blown-in fiberglass (Owens Corning or Johns Manville): Lightweight, easy to top off an existing attic without removing old material, and holds R-value when dry. Performance drops significantly if it gets wet from condensation or roof leaks.
- Blown-in cellulose: Made from recycled paper treated with fire retardant. Slightly higher R-value per inch than fiberglass, and forms a loose fill that resists air movement somewhat better than fiberglass. Heavier, so it’s less prone to wind displacement but more prone to settling in humid conditions.
- Spray foam (open-cell or closed-cell): Highest performance per inch and air-seals as it’s applied. Best for homes with no attic ventilation or where the attic is used as conditioned storage. Closed-cell options add structural reinforcement and a vapor barrier in one step.
- Rockwool batts: Stone wool, naturally fire-resistant, excellent sound control, and water-resistant. A good choice for homes in wildfire-prone areas of San Diego, where an ember-resistant attic assembly is worth extra consideration.
For most San Diego homeowners, the practical decision is whether to top off existing loose-fill insulation, remove and replace degraded material, or convert to spray foam for maximum performance. The right answer depends on the condition of what’s currently in the attic, whether there’s any history of condensation or leaks, and how the attic is vented. A visual inspection with photos tells the story quickly.
Common Mistakes to Avoid
- Checking insulation only when there’s an obvious problem. By the time you see ceiling stains or smell mold, the damage is done. The seasonal check schedule in this guide catches issues before they become repairs. Set calendar reminders for late October and late February.
- Assuming the insulation you can see is all you have. Depth isn’t the same as coverage. Wind-shifted insulation, compacted areas under foot traffic, and gaps around fixtures all hide from a quick glance. Check the perimeter, not just the center of the attic.
- Blocking soffit vents with new insulation. A common DIY mistake in San Diego: adding more blown-in insulation and burying the soffit vents in the process. The attic overheats, the AC works harder, and the new insulation doesn’t perform as expected. Use baffles before blowing more material.
- Ignoring the attic hatch. An unsealed attic hatch leaks air all year, but it matters most during marine layer season when humid air is pulled into the attic through the hatch gap, then condenses on the surrounding insulation. Sealing and insulating the hatch is a one-hour fix with real payoff.
- Venting bathroom fans into the attic. This is the single most common code violation we find in San Diego attics, and it’s the leading cause of attic mold in coastal neighborhoods. The fix requires routing a duct to a proper roof or wall termination. Delay this one and the mold window from December through February will find that damp spot.
- Replacing insulation before fixing the water problem. If the roof leaks, the condensation issue isn’t solved, or the bathroom fan is venting into the attic, new insulation will simply get wet and fail. Fix the source first, then insulate. A proper insulation removal in San Diego job includes identifying and addressing whatever created the problem in the first place.
- Putting off the ventilation check because the attic “looks fine.” Ventilation problems are invisible in mild weather. The test comes in late summer, when the attic hits 140 degrees and your AC can’t keep up. Check ventilation in spring, before the heat arrives, not in August when you’re already paying for it.
When to Call a Professional
Some insulation work is approachable for a motivated homeowner with a respirator, gloves, and patience, though our DIY vs Professional Insulation guide can help you decide where to draw the line. Checking depth, visually inspecting for damage, sealing an attic hatch, and clearing leaves from static roof vents all fall into that category. But there are specific situations where calling a professional now saves money and frustration later.
Call a professional if you find wet or moldy insulation that goes deeper than the surface layer. Removing and replacing contaminated material requires proper containment, disposal, and figuring out what caused the moisture in the first place. Call if your home predates 1990 and the attic has original loose-fill that’s settled below the joists. Topping off is straightforward, but there’s a right way and a wrong way to do it without creating ventilation problems. And call if you saw Santa Ana wind displacement two years in a row. That’s a sign the existing insulation is too light to stay put, and the fix is either heavier material or a spray foam seal that anchors the attic floor. Laurel Attic Insulation San Diego offers written estimates before any work starts, so you’ll know what a fix actually costs before you commit. Call (619) 793-3676 and you’ll talk to a live person, not a voicemail queue.
Frequently Asked Questions
Twice a year is the minimum for San Diego homeowners: once in late October or November, after the first Santa Ana wind events, and once in late February or March, before summer heat builds. Between those checks, monitor your utility bill in July and August using the dollar-per-square-foot benchmark from this guide, and explore more guides & resources for year-round attic care.
Most attic insulation jobs in San Diego run between $900 and $2,400, depending on square footage, the R-value needed, and whether existing material needs removal first. Spray foam runs higher per square foot but eliminates the need for separate air sealing. The only way to get an accurate number for your specific attic is an inspection with a written quote. Call (619) 793-3676 for a free estimate.
Yes, and it’s more common than most homeowners realize. Strong pressure differentials during Santa Ana events with gusts over 35 mph physically redistribute loose-fill insulation away from eaves by several inches. Batts near gable vents also get displaced. If your attic consistently shows bare spots near the perimeter after wind events, the fix is heavier material or air sealing, not just raking it back.
Topping off existing insulation is almost always cheaper than full removal, and it’s the right call when the existing material is dry, uncontaminated, and simply below current R-value recommendations. Removal is necessary when there’s mold, water damage, rodent activity, or the old material has compressed and degraded. A professional assessment will tell you which path applies.
Yes. Attic bypasses are the invisible gaps around light fixtures, plumbing penetrations, and top plates that allow air, including smoke, to move between the attic and living space. Sealing those bypasses, either with spray foam or targeted caulking and foam application, meaningfully reduces smoke infiltration during fire season and improves indoor air quality year-round.
The simplest test is a temperature check on a hot afternoon. If the attic feels hotter than the outdoor air by more than 15 degrees on a sunny day, ventilation is inadequate. A properly vented attic should stay within 10 to 15 degrees of ambient outdoor temperature. If yours cooks at 140 degrees while it’s 85 outside, the ventilation system needs attention before insulation becomes the limiting factor.
The Bottom Line
San Diego’s insulation challenges are seasonal, predictable, and fixable. The four windows: post-Santa Ana wind displacement in October and November, marine layer condensation from December through February, ventilation checks in March through May, and utility bill monitoring from June through September. Year-round, those same attic bypasses that leak energy also let wildfire smoke into your living space. Two inspections a year catches most problems before they show up as a high bill or a ceiling stain. The payoff for staying on schedule is lower cooling costs, better indoor air, and an attic that works with your home instead of against it. If you want someone to check yours, Laurel Attic Insulation San Diego home is the place to start.
Written by Chase Whitaker, Owner at Laurel Attic Insulation San Diego, serving San Diego since 2003.